


Ever opened a paint-by-numbers kit and thought that shade looks nothing like the picture? Or maybe a color is missing entirely. You hesitate. Can you just mix paint colors and fix it yourself? Or will that ruin everything? That quiet doubt? It is more common than you think. One wrong blend and suddenly your canvas goes from relaxing to stressful. But here is the good news: mixing is not only possible, it is sometimes the best way to get the result you want.
This guide walks you through exactly how to mix paint colors in paint by numbers without turning your masterpiece into a muddy mess. From tiny tweaks to full-blown blends, we will show you what works, what fails, and why a little mixing can save your painting.
Tip | Always test your custom mix before putting it on the canvas. Once it is on, there is no undo.
Why Mix Paint Colors in Paint by Numbers?
You open the paint kit. All colors are labeled, measured, and packed, but somehow, they still fall short. Some shades are too flat, others too bold. You follow the numbers, yet the result feels… off. That is when you start thinking, what if I just mix paint colors myself? Let’s be honest. Standard kits can only offer so much. They cannot account for how lighting, mood, or personal taste affects what you want from the artwork. Here is why mixing makes sense:
- Standard kits come with limitations | They are designed for mass production, not personalization.
- Mixing gives you full control | Want a custom shade between two tones? You can create it.
- You add depth, not just color | A blended sky, shaded skin, or layered petals give life that flat colors cannot.
Sometimes, even a small mix of colors changes everything, turns a rigid pattern into something soft and expressive. The ability to mix paint colors in a paint-by-numbers setup is not just for fixing errors. It is for upgrading your artwork into something that feels more like you.
Idea | Try blending a soft gradient in the background instead of using a solid fill; it creates natural depth instantly.
What Competitors Say | Gaps You Probably Never Noticed
So, we did the homework. We read through the popular Painting With Numbers blogs, Paint Your Numbers, Herrschners, and a few Reddit threads, too. Everyone is saying the same thing: “Yes, you can mix paint colors, just be careful.” That is it. No real walkthrough, no specifics, just surface-level blending tips. But here is what they are missing.
They do not talk about ratios. No one tells you how much of each color to mix. A drop? Half? Eyeball it? What if you need the same color again later? They also skip tools. Most guides ignore how the wrong brush or mixing stick can contaminate your entire palette. You will find advice like “just use the lid,” but that is a shortcut with long-term regret.
And record keeping? Forget it. Not a single competitor tells you to track your mixes. Which is wild, because once that perfect shade runs out, it is gone unless you note how you got there.
Fact | Even small traces of leftover paint on your brush can ruin a new mix. Always rinse before switching colors.
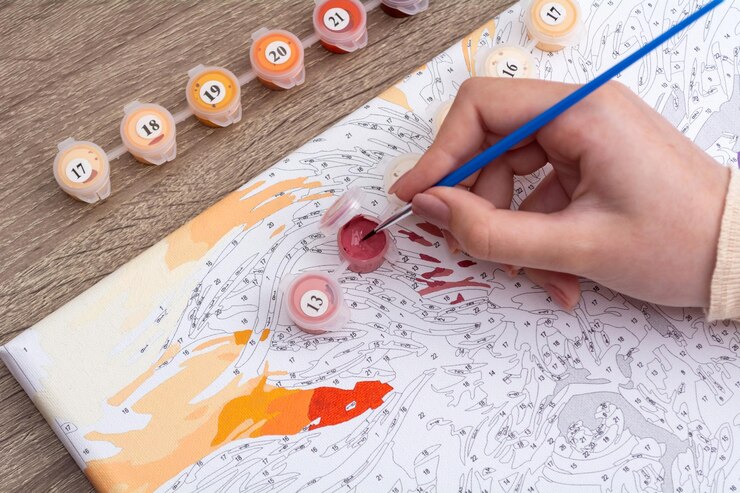
Tools & Setup Needed | What You’ll Use to Mix Paint Colors
Before you start mixing anything, pause. This is where most people mess up, grabbing the wrong tool, using the paint lid, or dipping into the palette with a brush that still has last week’s color on it. Let us get it right from the start. If you want to mix paint colors in your paint-by-numbers kit and keep the results clean, you need a proper setup. Here is what you will need:
- A plastic or ceramic palette | Avoid paper, it absorbs acrylic moisture.
- Small mixing cups or sauce trays | Perfect for batch blends or saving leftover paint.
- Toothpicks | Yep, Reddit’s favorite for small swirls without overmixing.
- Brushes (clean and dry) | Never reuse a wet one from another color, as it will dilute your mix.
- Paper towel & water cup | You will clean more than you think.
- Disposable plate | Cheap, easy to replace, and works great for quick mixes on the fly.
Set all of this up in a clean, flat space. Lay a cloth or plastic sheet under your work zone; it is going to get messy. Lighting matters too. Mix under daylight bulbs if you want true color perception.
Tip | Always mix more than you think you need. Replicating a custom color later is rarely 100% perfect.
You do not need anything fancy. But skipping the right tools? That is where frustration sneaks in. This setup saves your sanity.

Step-by-Step Mixing Process | How to Mix Paint Colors Without Wrecking Your Canvas
If you have ever tried to mix paint colors in a paint-by-numbers kit and ended up with something dull, patchy, or just plain wrong, you are not alone. It seems easy at first… until your bright lilac turns gray or your highlight shade looks like a coffee stain. This is where technique matters.
Learning how to mix paint colors the right way is what separates a decent result from a painting that actually pops. Here is how you do it without turning your canvas into a color experiment gone wrong.
• Choose your base paint colors carefully
Before you start mixing anything, take a good look at the paint-by-numbers reference image. That blurry blue spot might need a cooler undertone than what the labeled color gives you. Whether you are creating a mid-tone skin color or adjusting a sunset blend, the paint colors you start with define what comes next. Matching the feel is often more important than matching the label.
• Use proper ratios — stop guessing
This is where people destroy their blends. Instead of scooping random amounts, use simple ratios. A 1:1 (half and half) ratio is a good place to begin when learning how to mix paint colors. Want something lighter? Push 3 parts of white to 1 part of the other shade. Want a deep tone? Do the reverse. A toothpick helps manage these ratios precisely, way better than a brush.
• Mix in small batches and test every time
Never mix a full jar unless you have already tested that color. Acrylics dry fast, and they dry darker than they look wet. Always swatch your mix on a spare paper, let it dry, then decide. This step is what separates careful artists from regretful ones.
• Record every mix paint colors ratio | trust us
When mixing custom paint colors in your paint-by-numbers project, even small shifts in ratio create a different shade. So record it. Use tape, a scrap sheet, or even your phone. A saved formula means you can recreate it later and keep your painting consistent across every section.
• Clean your tools fully after every paint color mixing session
Here is where contamination sneaks in. Dirty brushes, leftover acrylic in your palette, or even dampness from water can distort your new color. Always clean your tools between mixes and let them dry before dipping again. Mix paint colors with clean tools, or you risk destroying all your effort.
So if you are still wondering how to mix paint colors without messing it all up, it comes down to patience, smart ratios, clean habits, and good notes. Mixing is not a hack. It is part of the creative process in every serious paint-by-numbers project.
Blending vs. Layering | What Most Paint by Numbers Guides Skip
So you have started to mix paint colors like a pro. But then something weird happens, the edge between the two sections looks harsh. You try dabbing the brush, maybe adding water, maybe reapplying color… and suddenly, the canvas starts to look overworked. This is where most people confuse mixing with blending two very different techniques in paint by numbers.
• Wet-on-wet blending
This one is all about timing. You paint one color, and while it is still wet, you blend in a second. The paints mix slightly on the canvas, creating a soft gradient. It works best when the two shades are already close in tone. People often use this to transition skies, skin, or backgrounds. But if your paint dries fast, which acrylics will you need to move quickly?
• Wet-on-dry layering
This is more controlled. Paint one area, let it dry, then apply another color on top. This creates depth and dimension without merging the two. Instead of trying to mix paint colors before applying, you are layering them directly on the canvas. Artists use this to create shadows, textures, or highlights, especially in custom paint-by-numbers kits where detail matters.
• Horizontal or circular blending techniques
Rather than tapping or stabbing with the brush, try dragging the brush horizontally across wet edges. Some prefer small circular strokes. Both give smoother transitions between two adjacent areas. Again, timing is everything here. If one part is dry, it will resist the blend.
• When to blend vs when to mix paint colors
This is where most painters overthink. If you want a new color altogether, mix paint colors on the palette first. But if you like the existing shades and just want them to meet softly, blend them on canvas. Mixing is about changing color. Blending is about controlling the relationship between two.
Quote | “Mix on the tray when you need a new color. Blend on canvas when you want a new texture.” from a Paint Your Numbers workshop guide
Color Theory Essentials | The Secret Behind Every Great Mix
You do not need an art degree to learn how to mix paint colors, but if you ignore basic color theory, you will spend more time fixing mistakes than enjoying the painting. Understanding how colors interact before you dip your brush makes a world of difference.
• Primary + Primary = Secondary
Red, blue, and yellow are your primaries. Mix two, and you get a secondary: red and yellow make orange, blue and yellow make green, and red with blue gives you purple. Every time you mix paint colors from scratch, you are using this rule, whether you know it or not.
• Tertiary colors build complexity
Blend a primary with a secondary, and you land on tertiary territory like blue-green or red-orange. These are the rich, in-between tones that bring subtle life to backgrounds, shadows, or fabrics in custom paint-by-numbers kits.
• Mixing with white or black changes the depth
Adding white gives you a softer, lighter, more delicate look. Black gives you a shade darker, heavier, and often moodier. But here is the catch: black overwhelms fast. Just a touch too much and your fresh teal becomes near-black sludge.
Fact | White can stretch your color, but black will crush it. Always add black sparingly.
• Complementary colors correct mistakes
If your color looks a bit too loud or just wrong, add a complement, the opposite of the color wheel. Orange can tone down blue, and purple can soften yellow. It sounds technical, but it works like magic.
Once you understand how to mix paint colors through simple theory, not just trial and error, you gain control. Your brush becomes the decision-maker, not just the follower of numbers.
Common Pitfalls & Fixes | Why Your Mix Looks Muddy?
You tried to mix paint colors and somehow ended up with a lifeless brown blob instead of that soft sunset peach. It happens more than anyone admits. But most of the time, the problem is not your eye for color. It is the process behind it.
• Overmixing leads to dull, lifeless shades
You stir too long, trying to get it perfect, and suddenly it is flat. Colors lose energy when blended into oblivion. Mix gently just enough to combine.
• Dirty brushes cause unexpected contamination
You think you are using yellow and white… but your brush had blue on it. Now you are mixing three colors, and none of them wants to meet. Always rinse.
• Mixing in separate batches = chaos
You mix a custom color one day, run out the next, and try to recreate it from memory. Spoiler: it never looks the same. That is how a record mismatch ruins consistency across your painting.
Tip | Label your mixes or write down ratios. Acrylics are fast but unforgiving when you need to remix from scratch.
To mix paint colors without running into trouble, focus on clean habits, small test batches, and tracking what worked. It is not about being perfect; it is about being prepared.
Maintaining Consistency Across Canvas | Keep That Perfect Mix from Turning on You
You finally nailed the perfect shade, and then, halfway through the painting, it runs out. You try to mix paint colors again, but something’s off. Too bright. Too dull. Too… something. That is the kind of inconsistency that ruins flow. Keeping your colors consistent is not just about luck; it is about smart planning.
• Always record your ratios
It sounds boring, but it works. Write it on masking tape, use your phone, scribble it on a napkin, whatever. Just make it trackable.
• Mix enough paint to cover a full section
If a tree spans five sections, mix enough for all five. Repeating a perfect mix is harder than it sounds, especially with subtle tones.
• Label your jars or trays
When using small containers, mark them clearly. One mistake and your carefully created color becomes a mystery puddle.
Idea | Use transparent trays to track how much mixed paint colors you have left for each area.
When you mix paint colors with consistency in mind, your final artwork flows seamlessly, not in patches of “almost close enough.”
Preservation & Finishing Tips | Lock It In Before It Fades
You spent hours trying to mix paint colors just right, the last thing you want is for that perfect blend to crack, fade, or dry out too soon. Once your painting is done, it needs a proper finish. Skipping this part? That is how you lose the magic.
• Let everything dry fully | no shortcuts
Rushing to seal wet paint will trap moisture, cause cloudiness, or even peel later. Give it at least 24 hours to dry.
• Apply a sealant to protect your work
Use a clear acrylic varnish, matte, satin, or gloss, depending on your preference. It locks in your custom blends and protects them from dust and fading.
• Store leftover mixes in airtight containers
If you mix paint colors for touch-ups, do not toss the extra. Use small airtight jars so you can come back later if needed.
Fact | A sealed artwork not only lasts longer, it also looks more vibrant, especially with blended or mixed tones.
Treat your painting like it deserves to last. That finish is not just a final step it is a layer of respect.
Best Practices Recap & Workflow Cheat Sheet | Your Paint Mixing Survival Guide
Let us be honest. Mixing paints in a custom paint by numbers kit is not always smooth. Things spill. Ratios go wrong. But when you follow a solid workflow, it becomes second nature. Here is your no-fluff cheat sheet to mix paint colors the smart way.
• Choose your base colors based on what the painting needs, not just the chart
Match tone, not just label.
• Start with a small mix using measured ratios
Go 50/50, or tweak with white or a darker color.
• Test everything | wet mixes always dry differently
Use a scrap piece, let it dry, then decide.
• Record your ratio every single time
Do not assume you will remember it; you won’t.
• Clean your tools between each paint color mixing session
Leftover paint contaminates everything.
• Store extras & seal your work
Preserve what you made, you may need it later.
Tip | Screenshot this section or jot it on a sticky note. It saves you when you are deep in the paint and losing track.
Master the flow, and your painting stops feeling like a task and starts feeling like a craft.
Mixing Is Not Just Allowed | It Is Encouraged
You started out wondering if you could mix paint colors in a paint-by-numbers kit. Now you know not only can you, but doing it well brings the whole canvas to life. The numbers guide you, sure. But the magic? That is in your hands.
So go ahead, mix paint colors, test new blends, try something bold. Share your results, the good and the messy. Painting is not about perfection. It is about expression.
Want to show us your mix? Drop your tips in the comments or tag your masterpiece online. Need a new kit to try it all on? [Explore our shop here].


