


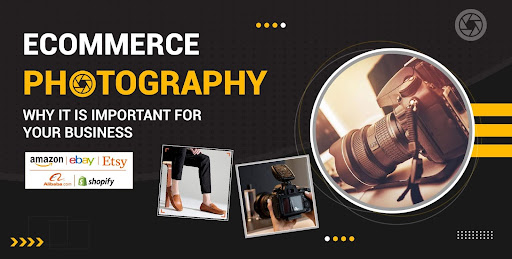
High-quality and attractive product images help online business owners differentiate themselves from competitors. Compelling visuals convince customers to purchase the items as they feel more confident and secure. All these are only possible if you are good at ecommerce product photography.
Your target audience can’t physically see and touch the goods like brick-and-mortar stores. They have no option but to rely on your online images. 360-degree views of online items can increase sales by up to 30%.
Professional and enticing e-commerce photoshoots help you stay ahead of your rivals. When your online store goods look visually appealing, they can make a strong impression to elevate your brand’s perceived value. This article covers what ecommerce photography is, why you need it, and some expert tips to follow.
What is E-commerce Product Photography?
Powerful visuals can say more than a thousand words. E-commerce product photography is all about incorporating professional photography with online retail. Simply put, it is the action you take to capture images of items to post them online.
Online businesses utilize ecommerce product image editing to create high-quality images that highlight an item’s features and attract potential customers to purchase the item.
For example, 360 views of online store goods can give buyers a feel of holding the product virtually. It offers customers a more interactive experience.
Why is E-commerce Product Photography Important?
Ecom items provide buyers with a visual representation of products. Here is why online business retailers should be more serious about ecommerce photography.
01. Higher Conversion Rates

Several studies and research in e-commerce showed that well-photographed product visuals can increase conversion rates by up to 60%.
Another study found that 93% of customers consider the image when purchasing the item.
But why do high-quality photos matter? They are proof of clarity, professionalism, and attention to detail of a product. Shoppers can see its color, texture, and features appropriately.
Customers can visualize the value they will get from the online store goods. They will feel confident whether the product will solve their problems and satisfy their needs.
02. Showcase Product Details

The more details a shopper receives, the more s/he is influenced to purchase the item.
During ecom photoshoots, a photographer may utilize different photoshoot techniques, such as close-up shots, side-view shots, flat-lay shots, etc.
These detailed photoshoot approaches help you highlight small elements and unique features that might not be visible in regular images.
03. Establishes Emotional Connection
When a product is connected emotionally, customers feel more engaged. They visualize how they will feel after wearing or using the item.
A creative photographer focuses on forging emotional connections with consumers through compelling shots. Buyers feel a deep and personal bond with the item. It positively influences their buying decision.
For example, showcasing product usage in real-life situations demonstrates practical application. It enables you to represent its value proposition and strengthen the visual identity of the brand.
Types of Product Photography
Product photographers can use a wide range of approaches to capture online store goods. The following are the primary categories of product photography.
01. Individual Shots

An individual shot means capturing only the main subject. Nothing will be included in the frame except the item.
The main objective is to focus on the item and its features. This makes the visual distraction-free. You can use this photography technique for goods like fashion, jewelry, home items, tech gadgets, etc.
Experts recommend using a white or simple background for such photography techniques to maintain the focal point and brand consistency.
02. Group Shots

A group of product shots showcase multiple items within the frame. This photoshoot approach is ideal for beauty items, sportswear, clothing, skincare stuff, etc.
It helps buyers to see product sets in one photo. Customers can better understand what type of items a brand offers by looking into a single image.
This comes in handy when a product is available in different sizes, colors, and materials.
03. Lifestyle Shots

When a product is presented in a real-life scenario with a relevant surrounding environment and elements, it is called a lifestyle or in-context shot.
It gives customers a better understanding of the item. They can visualize how they can use it in a particular situation.
The narrative and emotional impact of such product in-action photography are high. It delivers excitement and motivates potential customers to buy the item.
04. Scale Shots

When an image aids the target audience in estimating the size and dimension of a product relative to its surroundings, it is called a scale shot.
A photographer must maintain an appropriate distance between the camera and the main subject to help viewers understand the relative size of the object.
You can represent its size by comparing it to other objects or through real-life models.
05. Detailed shots

A close-up shot allows customers to see the intricate details of the item. This photography approach is mainly used to highlight the key features of a product.
It can transform ordinary images into stunning visuals by adding exciting and dramatic effects. Detailed shots convey a specific mood or tone to attract customers through intimate looks.
Product photographers mainly use smaller sensors to achieve a greater depth-of-field in images.
06. Packaging Shots

When the packaging of the main product is shown attractively along with the primary item, it is called packaging shots.
Customers can visualize how the stuff will look like when they receive it. They create a positive perception in their mind about the brand value.
Attractive packaging creates an initial impression at the first moment and lures buyers to explore the item further. For instance, if a product package has eco-friendly materials, sleek designs, or unique textures, it can be the perfect technique for brand storytelling.
07. Flat-lay Shots

When an item is captured directly above the overhead area, it is called a flat-lay shot. Items are usually placed on a flat surface. It is often called bird’s eye view.
This type of technique is popular for food and fashion photography. Photographers even use it on social media platforms like Instagram and Pinterest. Customers get a full view of the product.
Flat-lay shots are also a perfect choice for clothing photography. You can see the color, texture, and details more clearly. It allows you to maintain a consistent look. This photography technique is suitable for showcasing products of various sizes.
E-commerce Photography Equipment and Tools

The following are the most critical equipment and tools you need for ecommerce product photography.
01. Camera
Choose a high-end digital or mirrorless camera for ecommerce product photography. A manual control system must be installed to adjust the aperture, shutter speed, and ISO.
Besides, the digital camera needs to have a high resolution to capture the finer details of the online store goods.
02. Lens
Use a macro lens to take your product photography to a new height. It is especially useful for close-up shots of small subjects.
These prime lenses offer a flat field of sharpness and optimum resolution even from minimal short distances.
03. Tripod
Panhead tripods are the best choice for capturing products in studios. They are highly flexible. You can adjust their position vertically and horizontally.
But you can also use a fluidhead tripod. It helps you move the camera smoothly and steadily.
04. Reflector
Photographers use reflectors to redirect existing light to a particular subject and level up the visuals.
This photography tool creates a more natural and flattering light source and fills in shadows. You achieve your desired effect by manipulating the available light.
05. Props
Adding appropriate props along with the main product increases its perceived value. But choose these physical elements carefully. They should look like they belong there.
When choosing props, consider their materials, shape, size, color, texture, and other attributes. These material objects must harmonize with the primary stuff.
They should depict the intended use and accentuate important characteristics of the main item.
06. Table
Use a highly functional and versatile table to showcase products in different setups. This piece of furniture must have a non-reflective surface to avoid unwanted reflection.
Buy a table that comes with adjustable height to shoot items from various angles. Choose a portable or stationary table depending on the item type.
07. Photo Editing Software

Professionals use various types of software for e-commerce photo editing, such as Adobe Photoshop, Adobe Lightroom, GIMP, Canva, Adobe Illustrator, etc.
Editing product images is necessary to showcase products accurately and captivatingly. Focus on giving viewers the exact idea of the online store goods.
How to Set Up A Studio for E-Commerce Photography?
You have already learned what equipment you need to capture online store goods. Let’s discuss how to set up a studio for e-commerce product photography.
Step 01: Find A Dedicated Space

Choose a perfect location for setting up a studio. You can select a rectangular shaped room to create a balanced and natural acoustic environment. It enables you to predict acoustic behavior easily.
The best size of an ecommerce photography studio can be between 300 and 600 square feet. The ceiling height should not be less than 10 feet. Otherwise, you will struggle to place lights at different angles.
Look for an area where sunlight will come. But you must have the ability to control natural light.
Step 02: Set Up Your Studio with Proper Lighting

Proper lighting is a key attribute of a product photography studio. Maintaining a balance is the key to avoiding overexposure and underexposure.
But what type of lighting equipment do you need for ecommerce photography? For continuous lighting, experts use fluorescent, tungsten & LED.
You also need strobe or flash lighting equipment for better distribution of lights.
Step 03: Add Perfect Backgrounds

A product image with the right background can help you attract target customers. Most experts recommend using a white backdrop to maintain the focal point of the main item.
Plain white papers are the most widely used backdrops. They are cheaper than high-end backgrounds.
You can also use white cotton fabrics. They are highly versatile and work well with various types of products. Most importantly, cotton fabrics have a soft and matte finish to reflect lights evenly.
If you have a reasonable budget, white matte vinyl backgrounds are the best choice. They have a non-reflective surface to unwanted reflections or glare. Plus, their smooth surface delivers uniform lighting and consistent texture.
Step 04: Position Your Product

How do you place your product in your photography studio? Should you use display stands, mannequins, or flat-lay techniques to present your item?
Display stands are a good choice for items like perfumes, cosmetics, watches, jewelry, footwear, etc. But mannequins are better for clothing and accessories.
In contrast, the flat-lay image technique works well for stationery, gadgets, food, or fashion accessories.
Regardless of the displaying method you follow, make sure your product is clearly visible and maintain a professional look.
9 Pro Tips to SUCCEED in Ecommerce Product Photography
Mastering ecommerce product photography takes years. The following are some killer techniques to take your photoshoot skills to new heights.
01. Feature More Than One Image Per Product

Take pictures from different angles and zoom-in shots to showcase it from various views and perspectives. It enables you to show a genuine look and feel of the item.
Besides, customers are less likely to return the online store goods due to clearer representation and richer shopping experience. They feel more confident to purchase the item.
So, how many photos do you need for ecommerce per item? Provide at least 3-4 images. But keep it between 5-6 pictures. Otherwise, customers will feel overwhelmed.
02. Fill the Frame

Maintain a minimal distance between the camera and the stuff. It enables you to fit the item perfectly within the frame.
In contrast, keep as much space as you can between the item and the background. It helps you add more depth to your ecommerce photography and put more focus on the item.
03. Stay Updated with Trends

Keep yourself constantly updated with the latest product photography trends. These new ideas and techniques can help you stay ahead of your competitors.
For example, you can follow a minimalist design approach to simplify your online store goods presentation. It decreases the compositional elements, removes distractions, and adds more focus to the main visuals.
Another popular technique is product animation to inform and educate potential buyers about an item’s features, functionality, and design details.
04. Watermark Your Images

It takes several days to capture pixel-perfect product images. Should you give your competitors any chance to steal your hard work?
Always watermark your ecom photos to ensure legal protection from rivals who sell the same items. It is also a good technique for branding your goods.
What type of watermark should be used in e-commerce photography? It can be anything: a graphic, text, or pattern. Make sure it is highly relevant to the brand context.
Where to add the watermark? Put the watermark in the center, as it is the busiest part of the image.
05. Showcase each product color

Do you sell the same ecommerce items in different colors or styles? Add all color options or styles on your website to help prospective buyers learn the available options.
Should you capture all colors of the item? A straightforward solution is e-commerce photo editing. Click one shot and manipulate it to other shades.
You can use this technique for various options, such as clothing, shoes, furniture, bags, accessories, etc.
However, ecommerce product editing services may not always look realistic. You must capture photos of each variation of products, such as jewelry, transparent or glossy items, multi-material or glossy items, etc.
06. Avoid Lazy Photography

Of course, professional e-commerce image editing can transform your ordinary images into stunning ones. But don’t expect low-quality photos to do that much wonder, even after hiring the best professional photo editor.
No one can deny that good photography takes a lot of time and effort. It is worth reducing the hassle of post-production.
Focus on capturing the best ecom visuals. You will then have the leverage to spend less time on photo editing.
07. Don’t Judge Image Quality from Your Camera Screen

Do you immediately delete images from your camera device if they don’t meet your expectations?
Most modern digital cameras have an LCD screen. This type of screen has a lower resolution. Your captured images may look weird or unpleasant.
View these images on your computer or laptop screen to understand the actual composition. LED or OLED displays show organic compounds in photos.
08. Don’t Forget about Composition

Why does your target audience bother looking at your product photo if you don’t give them a reason to do so?
An image composition plays a key role in creating compelling and engaging visuals. Draft a solid plan and note down all elements and contexts that you should use and should not.
Review your ecom photoshoot to see whether it aligns with your objectives. Don’t dodge yourself. If you are not satisfied with the results, go for multi-session photoshoots.
09. Create a Template

Should I tell you a secret recipe to cut down your photo editing time? Let me give you some free advice. Don’t worry, you don’t have to pay me anything!
Create a template to use the standard aspect ratio, color, text font, and other attributes. This pre-designed layout can streamline your image editing.
It saves your time and helps you remain consistent and productive. This comes in handy when you deal with hundreds of images daily.
FAQs
How much to charge for ecommerce photography?
The cost of ecom photography can be anywhere from $15 to $500 per image depending on different attributes, such as item type, studio setup, experience, etc.
How do you get into ecommerce photography?
Target an entirely different segment to begin your career in ecommerce photography in this highly competitive era. Diverse your portfolio by combining e-commerce photography with other niches.
How important are product photography and image editing in ecommerce?
Both are crucial in ecommerce because they directly influence the target audience’s buying behavior.
What is the purpose of ecommerce product photography?
The main objective of ecom photoshoots is to showcase items attractively online while highlighting an item’s features, quality, and design.
What is the best camera for ecommerce product photography?
Sony Alpha 7 IV is one of the best cameras for ecom photoshoots due to its high-resolution and advanced focusing function.
Conclusion
Regardless of your online platform, high-quality visuals are mandatory to influence customers to buy your products. We have already discussed different types of ecommerce photography and the right way to improve your photoshoot skills. Remember, conscious practicing can help you go a long way. Learn more from your mistakes and take your photography to a new height.


