


Importance of Annual Tune-Ups
Getting your heating system checked out annually is a smart move. Think of it like a yearly physical for your furnace or heat pump. A professional heating system maintenance tune-up helps catch small issues before they turn into big, expensive problems. Skipping this can lead to your system running less efficiently, which means higher energy bills and a home that’s not as warm as it should be.
Local homeowners often rely on Black Hills heating and plumbing services to handle these tune-ups, ensuring their systems stay efficient and dependable all year round.
It’s all about keeping things running smoothly and preventing unexpected breakdowns when you need heat the most.
What to Expect During a Tune-Up
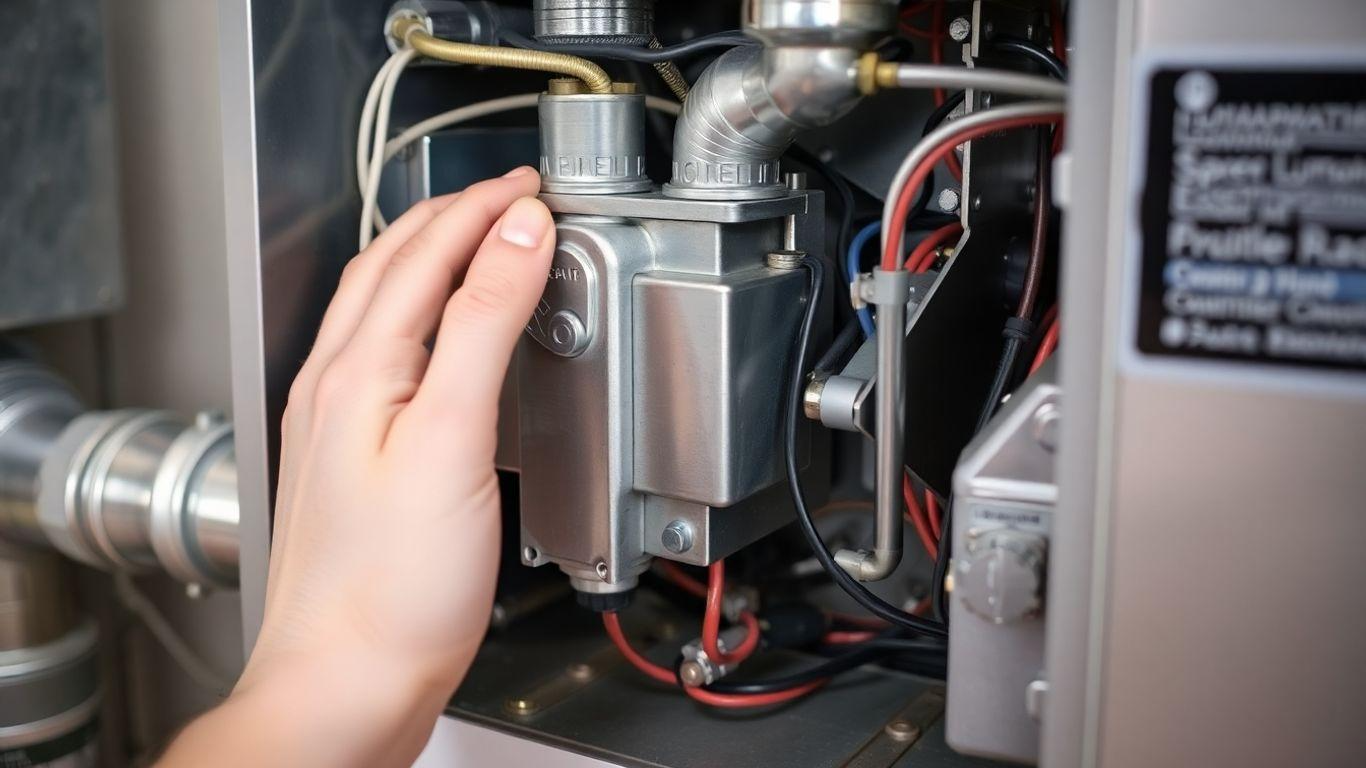
During a professional heating system maintenance appointment, a technician will go through a checklist. They’ll clean key components, check electrical connections, test safety controls, and inspect the overall operation of your system. They’ll also look for any signs of wear and tear that could cause trouble down the line. It’s a thorough check to make sure everything is in good working order. This proactive approach to heating system maintenance is key.
Benefits of Proactive Maintenance
Regular professional heating system maintenance offers several advantages. It helps your system last longer, operate more efficiently, and reduces the chance of emergency repairs during the coldest months. When your system is well-maintained, it uses less energy, saving you money on utility bills. Plus, knowing your heating system is ready for winter provides peace of mind. It’s a worthwhile investment in your home’s comfort and your system’s longevity.
Prepare Your Outdoor HVAC Unit
Clear Debris from Fins
It’s a good idea to give your outdoor HVAC unit a quick once-over before winter really sets in. Start by gently brushing away any leaves, dirt, or other gunk that might have collected on the fins. Proper airflow is key for your system to work efficiently. This simple step helps your unit breathe easier.
Think of it like clearing the vents on your own body; you want unobstructed airflow. Neglecting this can make your system work harder than it needs to, using more energy. Clearing debris from the fins is a small task that makes a big difference for your outdoor unit.
Manage Surrounding Vegetation
Weeds and plants can sometimes creep up around the base of your outdoor HVAC unit. It’s best to pull these out and keep the area clear. Also, trim back any tree branches or shrubs that are growing too close to the unit. You want to maintain at least 24 inches of clear space all around it.
This isn’t just about looks; it’s about function and safety. Overgrown plants can block airflow, making your system less efficient. Falling branches during winter storms could also damage the unit. Keeping the area around your outdoor unit clear is a smart move.
Protect Unit from Storage Items
Don’t use your outdoor HVAC unit as a makeshift storage shelf. Avoid piling patio furniture, grills, or other outdoor items against it. This can restrict airflow and potentially trap moisture, leading to rust or other damage.
While these units are built to withstand the elements, giving them a clear space is always best. If you’re concerned about falling debris like branches, you could consider a simple plywood cover for the very top of the unit, but remember to remove it before you turn the system on in the spring. Keeping the outdoor unit clear of stored items is important.
Test Your Heating System Operation
Perform Initial System Startup
Before the really cold weather hits, it’s a good idea to give your heating system a test run. Don’t wait for that first frosty morning to discover a problem. Firing up your furnace, boiler, or heat pump a few times beforehand lets you catch any issues early. This proactive step can save you from a chilly surprise and a long wait for repair services, as heating companies are often swamped on the first cold day.
It’s important to not only make sure the furnace, boiler, or heat pump turns on but runs properly and heats your home effectively. Even if you had a professional tune-up, testing the system yourself is a smart move. Set your thermostat to your usual winter temperature and let the system complete a full cycle. This initial system startup is your first chance to see if everything is working as it should.
This test run helps confirm that your heating system is ready for the season. It’s a simple yet effective way to prepare your home’s heating system for the demands of winter. Repeating this test a couple of times before the temperature drops significantly is recommended.
Observe Heating Cycle Performance
Once your heating system is running, pay close attention to how it performs. Listen for any unusual sounds, like repeated clicking from the unit itself, which could signal ignition problems, or loud bangs that might indicate delayed ignition. These sounds are indicators that your heating system might need attention.
Check if warm air is consistently coming from all your vents. Also, note if the system shuts down prematurely or if it runs for an extended period without reaching the desired temperature. Observing the heating cycle performance closely can reveal hidden issues that might not be obvious at first glance.
Pay attention to the details during the heating cycle. Small sounds or inconsistent airflow can point to larger problems that are best addressed sooner rather than later.
Address Any Detected Issues Promptly
If you notice anything out of the ordinary during your test runs, don’t delay in calling a qualified HVAC professional. Issues like repeated clicking during startup, unusual noises, or uneven heating need to be looked at right away. Addressing these problems promptly means you’ll have more time for repairs before the peak of the heating season.
Getting any detected issues fixed now ensures your heating system operates efficiently and reliably when you need it most. This proactive approach to maintenance is key to a comfortable and warm winter. Don’t wait for a breakdown; tackle any problems head-on.
This approach to testing your heating system operation is about preventing future discomfort and costly emergency repairs. It’s a small investment of time now that pays off in peace of mind and consistent warmth throughout the cold months.
Optimize Thermostat Settings for Efficiency
Getting your thermostat set up right is a simple way to save energy and keep your home comfy during the colder months. It’s not just about picking a temperature; it’s about smart scheduling.
Set Appropriate Winter Temperatures
For most homes, aiming for around 68°F (20°C) when people are awake and home is a good balance between comfort and saving energy. When the house is empty or everyone’s asleep, dropping the temperature by 7 to 10 degrees can make a noticeable difference in your heating bill. This practice of adjusting your thermostat settings is key to efficient heating.
Utilize Programmable Setbacks
Programmable thermostats are fantastic for this. You can set them to automatically lower the temperature during times you’re typically away or sleeping. Think about it: why heat an empty house? Setting these programmable setbacks means your system doesn’t have to work as hard when it’s not needed, leading to real savings. Consistent, programmed adjustments are more effective than manual changes.
Ensure Fan is Set to Auto
Your thermostat also controls your system’s fan. Make sure it’s set to ‘Auto,’ not ‘On.’ When the fan is in ‘Auto’ mode, it only runs when the heating system is actively producing heat. If it’s set to ‘On,’ the fan runs constantly, using extra electricity and potentially blowing cool air through your vents between heating cycles, which can make the house feel colder.
Address Potential Heat Loss in Your Home
Identify Common Areas of Heat Escape
Keeping your home warm during the colder months often means looking for where the heat is actually going. Think of your house like a sieve; heat finds its way out through tiny openings. Poor insulation in attics, walls, and floors is a major culprit, often accounting for a significant portion of heat loss. Other common spots include windows and doors, which can let in drafts if they aren’t sealed properly. Even things like ductwork, chimneys, and small gaps around pipes and electrical outlets can contribute to your heating system working harder than it needs to.
Locate Drafts and Air Leaks
Finding these weak points is key to preventing heat escape. A simple visual inspection can reveal obvious gaps around window frames and door edges. You can also try the hand test: on a breezy day, carefully run your hand along these areas to feel for any cool air movement. A candle can also be a useful tool; a flickering flame near a window or door suggests a draft. Addressing these leaks directly impacts how efficiently your home retains heat.
Seal Gaps Around Windows and Doors
Once you’ve identified where drafts are coming in, sealing them up is a straightforward way to improve your home’s warmth. Weatherstripping is great for the moving parts of doors and windows, creating a tight seal when they’re closed. For more stationary gaps, like those around window frames or where trim meets the wall, caulk is your best friend. Applying caulk or weatherstripping can make a noticeable difference in comfort and can help reduce your energy bills by keeping that precious warm air inside where it belongs. It’s a small effort that really helps combat heat loss.
Maintain Your Heating Equipment’s Interior
Replace or Clean Air Filters Regularly
A clean air filter is vital for your heating system’s efficiency and longevity. Over time, dust, dirt, and other particles accumulate on the filter, restricting airflow. This forces your system to work harder, consuming more energy and potentially leading to premature wear. Regularly replacing or cleaning your air filters prevents this buildup.
- Check filters monthly, especially during peak heating season.
- Replace disposable filters when they appear dirty or clogged.
- Clean reusable filters according to the manufacturer’s instructions.
Neglecting filter maintenance is a common oversight that can significantly impact your heating system’s performance and your energy bills.
Inspect and Clean the Blower Belt
The blower belt drives the fan that circulates warm air throughout your home. A worn or loose belt can cause inefficient operation or even system failure. Inspect the belt for signs of cracking, fraying, or excessive wear. If you notice any damage, it’s best to have it replaced by a professional.
Check and Clear the Condensate Drain
For high-efficiency furnaces, a condensate drain line removes moisture produced during the heating process. If this line becomes clogged, it can cause the system to shut down or lead to water damage. Periodically check the drain line for blockages and clear any debris to ensure proper drainage. This simple check helps maintain your heating equipment’s interior.
Prepare Your Whole-Home Humidifier
Replace the Water Panel
Your whole-home humidifier has a water panel, sometimes called an evaporator pad. This panel is key to adding moisture to the air. Over time, mineral deposits from the water can build up on it, making it less effective. It’s a good idea to swap out the water panel before the heating season really kicks in. Replacing the water panel at least twice a year, once before winter and once in spring, is recommended. This simple step helps your humidifier work efficiently and prevents potential issues down the line.
Clean the Water Reservoir
Inside the humidifier, there’s a water reservoir. Just like a coffee maker can get scale buildup, this reservoir can too. Mineral deposits and even some grime can collect here. You’ll want to take out the reservoir and give it a good scrub. Use a damp cloth to wipe away any buildup. This cleaning is important for the proper function of your whole-home humidifier and helps keep the air in your home healthy.
Clear Intake Vents and Housing
Many humidifiers have intake vents that pull air in to add moisture. These vents can get blocked by dust or other small debris. Take a moment to wipe down these vents and the exterior housing of the humidifier. Removing any obstructions ensures that air can flow freely through the unit. This maintenance step is quick but makes a difference in how well your humidifier performs throughout the cold months. A clean humidifier is a happy humidifier, ready to combat dry winter air.
Consider Fuel Levels and System Upgrades

Ensure Adequate Fuel Supply
Before the cold really sets in, it’s a good idea to check how much fuel you have for your heating system. If you use heating oil or propane, keeping an eye on your tank levels is important. Running out of fuel in the middle of winter is a real hassle, and you don’t want to be caught off guard. It’s generally recommended to schedule a refill when your propane tank hits about 20% or your oil tank reaches the two-fifths mark on the gauge. Ordering fuel in the fall can help you avoid potential delays and extra charges that might pop up during peak demand.
Knowing how much fuel you’ll need can be tricky, but there are some general guidelines. For example, a gallon of propane might power a furnace for about an hour, while oil furnaces can use anywhere from two to five gallons daily, depending on how cold it is outside. Regularly checking your tank gauge is key. Some newer systems even offer remote monitoring, so you can check your fuel reserves from your phone. Don’t let your heating fuel tank get completely empty; this can sometimes lead to moisture buildup, rust, and potential leaks in propane tanks, or clog oil lines in oil systems. Keeping your fuel supply topped up is a simple way to ensure consistent heat.
Schedule Upgrades Before Cold Weather
If your heating system is getting old or isn’t working as efficiently as it used to, now might be the time to think about an upgrade. Replacing a furnace or boiler is a big decision that impacts your home’s comfort and energy bills for years. When looking for a new system, check the AFUE (Annual Fuel Utilization Efficiency) rating. Higher AFUE ratings mean the system is more efficient. For instance, many modern gas furnaces boast AFUE ratings of 90% or higher, which can lead to significant savings on your heating bills.
When choosing a new system, consider the fuel source. Sticking with the same fuel type as your current system is often the easiest and most cost-effective route. Also, make sure the new system is properly sized for your home. An HVAC professional can assess your home’s square footage, insulation, and windows to recommend the right capacity. Don’t forget to look into available tax credits and rebates for high-efficiency equipment, which can make the initial investment more manageable. Planning for a system upgrade before the coldest months arrive means you can get the work done without the rush and ensure your new system is ready to go.
Benefits of Off-Season Installations
Getting a new heating system installed during the warmer months, often called an off-season installation, has several advantages. For starters, HVAC contractors are typically less busy in the spring and summer, meaning you might have more flexibility in scheduling the installation at a time that’s convenient for you. This also often translates to better pricing, as companies may offer discounts to keep their technicians busy during slower periods.
Beyond cost savings and scheduling ease, an off-season installation allows you to avoid the last-minute rush that often happens as winter approaches. You won’t have to worry about being without heat if your old system breaks down unexpectedly while waiting for a new one to be installed. Plus, if any issues arise during the installation process, the technicians have more time to address them thoroughly without the pressure of immediate cold weather demands. It’s a more relaxed approach to a significant home improvement.
Upgrading your heating system during the off-season can lead to cost savings and a smoother installation process, ensuring your home is ready for winter without any last-minute stress.
Wrapping Up Your Heating System Prep
Getting your home’s heating system ready for the cold doesn’t have to be a huge chore. By taking these steps, like changing filters, checking for drafts, and testing your unit, you’re setting yourself up for a warmer, more comfortable winter. Plus, a well-maintained system often means lower energy bills. Don’t wait until the first freeze to find out if something’s wrong – a little preparation now can save you a lot of hassle later. Think of it as giving your heater a little check-up so it can do its best job when you need it most.


